Top Tips How to Mix Grout Correctly in a Paddle Mixer

Time:2026-10-27 Author:Sophia
0%

Learning how to mix grout correctly in a paddle mixer begins with respecting the product, not rushing the bucket. Grout may look simple, yet water control, mixing speed, slaking time, and cleaning technique affect color, strength, and shrinkage. The Tile Council of North America’s 2024 Handbook emphasizes following the manufacturer’s instructions and maintaining consistent installation conditions. ANSI A118.6 and A118.7 also define performance requirements for cementitious and high-performance tile grouts.

Industry scale makes this skill increasingly important. Grand View Research reports continued growth in the global ceramic tile market, driven by residential renovation and commercial construction. More tile work means more opportunities for inconsistent grout. A slightly wet mix can create pinholes, weak joints, or uneven color. A dry mix can drag across the tile and leave empty joint sections. Small mistakes become visible under bright bathroom lighting.

Dave Gobis, former executive director of the Ceramic Tile Education Foundation, offers a practical warning: “Grout does not forgive shortcuts.” His point is easy to test on site. Measure the water, add powder gradually, and keep the paddle below the surface. A slow, controlled mixing action reduces air entrapment and splashing. Let the grout slake when instructed, then remix without adding extra water. It sounds basic. It is not always easy.

This guide explains how to mix grout correctly in a paddle mixer, with attention to paddle selection, mixing speed, workable consistency, and cleanup timing. Some recommendations may need adjustment for temperature, batch size, or product chemistry. That uncertainty deserves respect. The manufacturer’s technical data sheet remains the final authority.
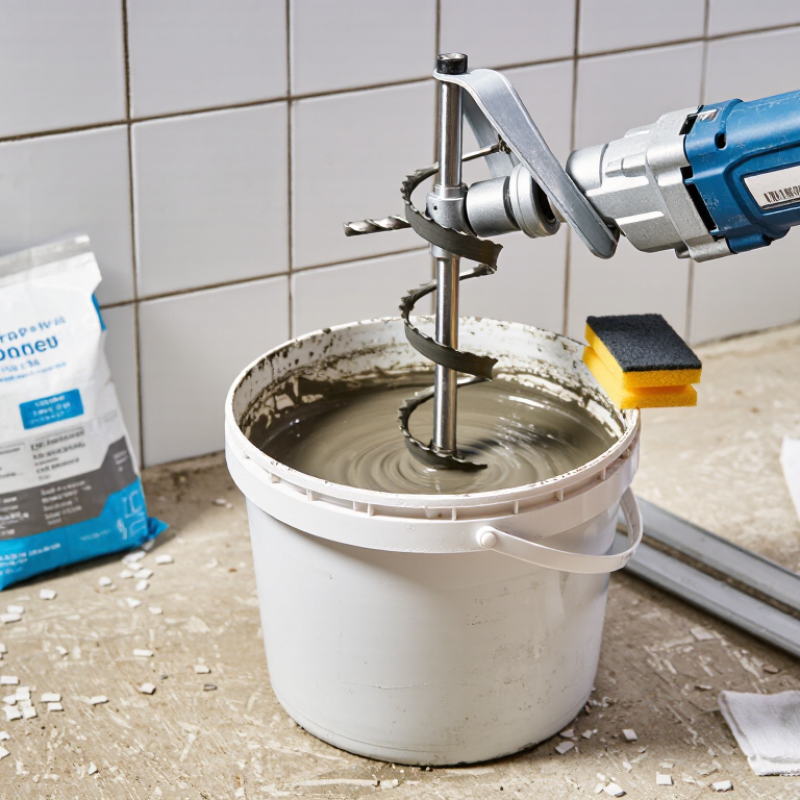
Top Tips How to Mix Grout Correctly in a Paddle Mixer

Identify Grout Type and Measure Water by the Specified W/C Ratio

Top Tips: How to Mix Grout Correctly in a Paddle Mixer

Identify the grout type before opening the bag. Cementitious grout uses a specified water-to-cement ratio, while epoxy grout uses separate resin and hardener components. Never apply a cement-based ratio to an epoxy product. Read the technical data sheet and confirm whether the ratio refers to the full bag or a smaller batch.

Measure water with a graduated container or digital scale, not by eye. Small errors can change flow, strength, shrinkage, and curing time. Use clean, cool water and place it in the mixing bucket first. Add powder gradually while the paddle runs at low speed. Keep the paddle below the surface to reduce trapped air. Mix until the color and texture look uniform, usually within the stated mixing time.

It should look consistent.

I once added extra water after seeing a stiff mixture, and the cured surface became noticeably weaker. That shortcut seemed harmless, but it changed the designed ratio. If the grout feels too dry, check the product instructions before adjusting it. Some materials need a short resting period, followed by brief remixing without additional water.

For large jobs, weigh each batch and record the measurements. Also consider temperature, because warm conditions can shorten working time. A small test batch can reveal mistakes before the mixer is filled. Consistency matters more than speed.

Load the Paddle Mixer and Begin at 300–600 rpm

Load the paddle mixer with clean water before adding grout powder. This reduces dry pockets around the blade. Add the powder slowly, while the paddle turns at 300–600 rpm. Keep the blade below the surface. A submerged paddle limits splashing and air entrainment.

The 300–600 rpm range is a practical starting point, not a universal rule. Mixer torque, paddle shape, grout viscosity, and batch size change the result. ASTM C305-22 specifies 140 ±5 rpm and 285 ±10 rpm for controlled mortar mixing, showing why laboratory speeds cannot transfer directly to every paddle mixer. EN 196-1 also uses defined low and high speeds for cement testing. Field mixing needs adjustment.

Begin near 300 rpm for a stiff grout. Increase gradually toward 600 rpm if the powder remains unmixed. Do not fill the drum beyond its rated working capacity. An overloaded mixer can stall, heat the motor, or produce uneven hydration. The U.S. Occupational Safety and Health Administration recommends controlling cement dust exposure through ventilation and suitable respiratory protection when necessary. Keep the lid or splash guard fitted.

Watch the surface closely. A smooth vortex is useful; a deep funnel can pull air into the grout. I sometimes stop after the first minute and scrape the sides. That extra check prevents hidden lumps. It is easy to rush this step. Follow the product’s stated mixing time and water ratio, then allow the specified rest period before remixing.

Mix for 3–5 Minutes Until the Grout Is Smooth and Uniform

A paddle mixer can produce excellent grout, but only when the mixing time is controlled. Start with clean water measured according to the product sheet. Add grout gradually while the paddle turns slowly. This reduces dry pockets and limits trapped air. Keep the paddle below the surface whenever possible.

Mix for 3–5 minutes until the grout is smooth and uniform. The exact duration matters less than the finished texture, but stopping early often leaves powdery streaks. ASTM C305 describes staged mechanical mixing for cement-based materials, including controlled speed changes and scraping. EN 196-1 also uses a defined mechanical mixing sequence, showing why casual, unmeasured mixing can reduce consistency. These standards are not grout instructions, so the manufacturer’s technical data must take priority.

Watch the surface closely. Properly mixed grout should flow steadily from the paddle without visible lumps or dry ribbons. Let it rest if the instructions require slaking, then remix briefly. Do not add extra water because the mixture looks stiff after resting. That shortcut can increase shrinkage and weaken the finished joint. I have found that a timer helps, even for experienced installers. Five minutes feels long on a noisy site. Still, rushing the final minute is a common mistake. Use a clean bucket, scrape the sides, and inspect the bottom before application.

Top Tips: How to Mix Grout Correctly in a Paddle Mixer — Mix for 3–5 Minutes Until the Grout Is Smooth and Uniform

Step Mixing Dimension Recommended Practice Why It Matters Quality Check
1 Read the product instructions Confirm the specified water-to-powder ratio, working time, curing conditions, and permitted mixing equipment before starting. Grout formulations differ, so the manufacturer’s technical instructions take priority over general mixing guidance. Use a measured amount of clean water and powder rather than estimating by eye.
2 Prepare the mixer and paddle Use a clean bucket and a suitable paddle mixer. Make sure the paddle is fully secured and free from hardened residue. Contamination and loose equipment can affect consistency and create lumps. The bucket and paddle should be clean, dry, and free of old grout.
3 Add water first Place the accurately measured mixing water in the bucket before gradually adding the grout powder. Adding powder progressively helps wet the material evenly and reduces dry pockets. Do not add extra water unless the product instructions specifically allow adjustment.
4 Control paddle speed Mix at a controlled, low-to-medium speed, commonly around 300–500 rpm when permitted by the product instructions. Excessive speed can entrain air, increase splashing, and make the mixture less uniform. The mixture should circulate smoothly without excessive foaming or material being thrown from the bucket.
5 Mix for 3–5 minutes Move the paddle through the bottom and sides of the bucket while mixing continuously until the grout is smooth and uniform. Thorough mixing distributes cementitious materials, pigments, fillers, and additives throughout the batch. No visible dry powder, hard lumps, streaks, or unmixed material should remain.
6 Scrape the bucket Stop briefly if necessary and scrape material from the sides and bottom back into the mixing zone, following the product instructions. Powder trapped at the edges can cause weak or inconsistent areas in the finished grout. The color and texture should look consistent throughout the bucket.
7 Allow slaking when required Some cementitious grouts require a short resting period after initial mixing, often about 5–10 minutes, followed by brief remixing. Slaking allows dry ingredients and additives to fully hydrate. Follow the stated rest time; do not add water during remixing unless explicitly permitted.
8 Check workability Use the grout within its stated pot life and apply it at the recommended consistency for the intended joint or application. Grout can stiffen over time, and adding water later may reduce performance or cause color variation. The grout should spread or flow as intended without separating, bleeding, or releasing excess water.
9 Maintain consistent batches Repeat the same water measurement, powder quantity, mixing speed, and mixing time for every batch. Consistent batching helps prevent differences in shade, strength, shrinkage, and curing behavior. Record the batch proportions and mixing times when uniform appearance is important.
10 Clean immediately Clean the paddle, bucket, and tools promptly with the appropriate method before the grout hardens. Hardened residue can contaminate later batches and reduce mixer efficiency. Tools should be visibly clean before the next mix.

Important: The stated mixing time, paddle speed, water ratio, slaking period, and working time are typical guidance values. Always follow the technical data sheet and safety instructions for the specific grout being used.

Allow a 5–10 Minute Slake Time, Then Remix Briefly

Top Tips How to Mix Grout Correctly in a Paddle Mixer

Allow a 5–10 minute slake time after the first mix. This pause lets cement, polymers, and fine fillers absorb water evenly. The Tile Council of North America Handbook recommends following the product’s stated water ratio and working time, rather than adjusting consistency by guesswork.

After slaking, remix the grout briefly at low speed. Thirty seconds is often enough, unless the technical data sheet states otherwise. Keep the paddle below the surface to reduce air entrapment. ASTM C305 uses controlled mixing speeds, including 140 ± 5 revolutions per minute for low-speed work, showing why aggressive mixing can distort consistency.

I have rushed this step before.

The grout looked smooth, yet it stiffened quickly in the bucket. That mistake taught me to scrape the sides during remixing, not add extra water. Extra water may improve spreadability, but it can weaken color uniformity and increase shrinkage risk. A 2023 technical review from the European Ceramic Tile Association also stresses consistent water measurement and batch control for reliable tile installation.

Check the texture with a margin trowel. It should hold a soft ridge without flowing. If small dry pockets remain, stop and inspect the mix. Do not compensate automatically. Temperature, humidity, and powder age can change the result, so record the batch ratio and timing on larger projects.

Use the Grout Within Its Typical 30–60 Minute Pot Life

A paddle mixer can produce smooth grout, but its pot life controls the entire workflow. Many cementitious grout technical data sheets state a usable window of about 30–60 minutes. The exact period changes with water temperature, room temperature, humidity, and mixing speed. ANSI A108.10 and the Tile Council of North America Handbook emphasize following the product’s written mixing and installation instructions. Do not treat the stated time as a guarantee.

Watch the clock. Start timing after the final water addition and complete mixing. Keep batches small enough to place, tool, and clean within that window. A cool bucket may slow stiffening slightly, while warm water can shorten working time. Avoid adding extra water when the grout becomes firm. That can weaken the mixture, change its color, and increase shrinkage. Instead, mix only the quantity the crew can apply safely. Clean tools between batches to prevent hardened particles from contaminating fresh grout.

A practical check is simple: spread a small test area and monitor drag, consistency, and joint filling. If the grout feels rubbery or resists tooling, discard it rather than retemper it. Mistakes happen. I once allowed a large batch to stand too long, and the final joints looked uneven despite careful cleaning. Record the room temperature and batch time during the first mix. That small habit improves judgment on the next batch.

FAQS

How do I identify the correct grout type before mixing?

Check whether it is cementitious or epoxy grout. Cementitious grout uses water. Epoxy grout uses separate resin and hardener. Never exchange their mixing methods.

How should I measure the mixing water?

Use a graduated container or digital scale. Do not estimate by eye. Small errors can affect strength, shrinkage, flow, and curing time.

What should go into the paddle mixer first?

Pour clean, cool water into the bucket first. Add powder gradually while the paddle turns slowly. This helps reduce dry pockets.

What paddle speed should I use?

Start around 300–600 rpm, depending on grout stiffness and mixer performance. Begin near 300 rpm. Increase slowly if powder remains unmixed.

How can I reduce trapped air during mixing?

Keep the paddle below the grout surface. Avoid creating a deep funnel. A smooth vortex is better.

How long should the grout rest before remixing?

Allow the grout to slake for about 5–10 minutes. Then remix briefly at low speed. Thirty seconds may be enough.

What should the mixed grout look like?

It should have a uniform color and texture. A margin trowel should form a soft ridge. It should not flow freely.

What should I do if the grout seems too dry?

Check the instructions first. Do not automatically add water. Some grout needs resting and remixing instead. I once added water too quickly, and the cured surface became weaker.

How can I improve consistency on a large project?

Weigh each batch and record its water ratio and mixing time. Keep batch sizes within the mixer’s rated capacity. A small test batch can expose mistakes early. Temperature still matters.

Conclusion

Learning how to mix grout correctly in a paddle mixer begins with identifying the grout type and measuring water according to the specified water-to-cement ratio. Add the materials to the mixer carefully, then start at a moderate speed of approximately 300–600 rpm to reduce splashing and improve control. Continue mixing for 3–5 minutes, or until the grout has a smooth, consistent texture without dry pockets or visible lumps.

After the initial mixing stage, allow the grout to rest for 5–10 minutes so the ingredients can fully hydrate. Remix it briefly before application to restore uniformity. Because grout typically has a pot life of around 30–60 minutes, prepare only a manageable amount and use it within that time. Following these steps helps produce a workable, even mixture and supports more consistent results during installation.

Sophia

Sophia

Sophia is a dedicated marketing professional with an exceptional depth of knowledge about her company's products and services. With a keen understanding of market trends and customer needs, she crafts insightful blog posts that not only inform but also engage readers, enriching the company’s online......