When a grouting pump loses pressure, the problem rarely appears without warning. A fluctuating gauge, weak discharge, or pulsing hose often provides the first clue. Many operators ask, “why is my grouting pump losing pressure” after checking the motor and finding nothing obvious. The real cause may sit inside the suction line, valve assembly, piston seal, or grout mixture.
This guide examines ten practical reasons for pressure loss during grouting operations. It draws on common field observations, manufacturer maintenance practices, and basic pump troubleshooting principles. Thick grout can restrict flow. Watered-down grout can reduce pumping resistance but create unstable pressure. Air entering through a loose fitting may produce foamy discharge and uneven gauge readings. A worn check valve can also allow pressure to fall between strokes.
Small details matter. Inspect the hose connections by hand. Watch the gauge during each stroke. Check whether the pressure drops only after the pump warms up. These observations can separate a blockage from a mechanical failure. Safety remains important, especially when hoses contain pressurized grout. Always follow the equipment manual and isolate pressure before opening components.
Troubleshooting is not always tidy. A clean filter does not prove the whole system is healthy. I have seen operators replace seals when a cracked suction hose caused the actual fault. That mistake wastes time and materials. The following reasons are not a substitute for professional service, but they provide a reliable starting point. Careful testing usually reveals where pressure escapes. Sometimes, the overlooked fitting matters most.
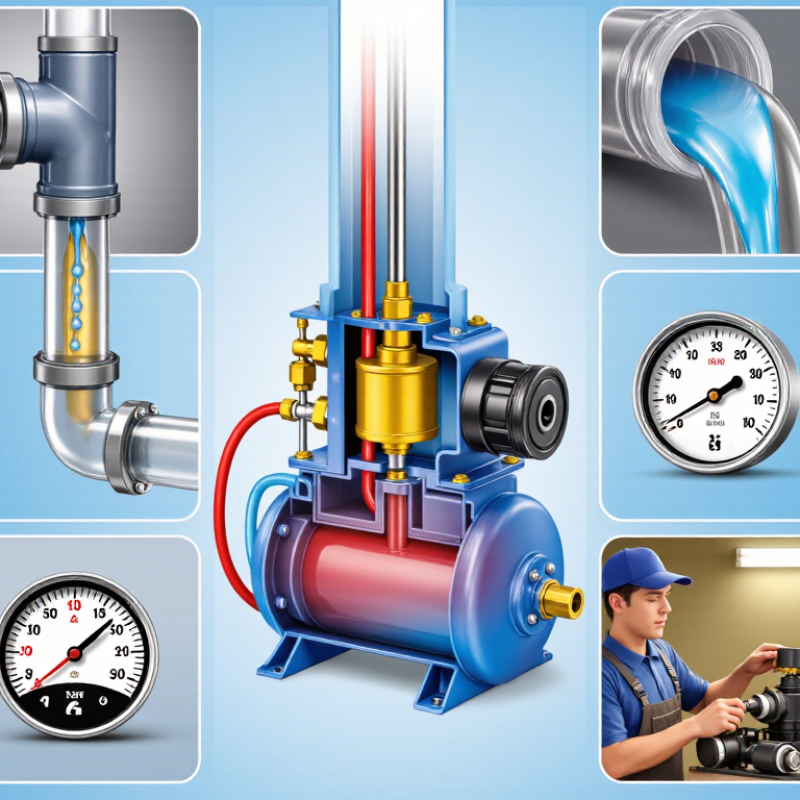
Top 10 Reasons Why Is My Grouting Pump Losing Pressure?
How a Grouting Pump Maintains Pressure During Operation
A grouting pump maintains pressure through repeated positive-displacement strokes. Each stroke moves a measured grout volume through inlet and outlet check valves. When the line meets resistance, pressure rises. A relief valve, bypass line, or pressure regulator prevents unsafe overload. A pulsation dampener also smooths pressure between strokes. Without it, the gauge needle may jump sharply. That movement can hide real pressure loss.
Several causes are surprisingly ordinary. A leaking hose coupling, worn valve seat, trapped air, or partially blocked nozzle can reduce delivery pressure. Grout consistency matters too. Specifications using ASTM C939 often target flow-cone times near 35 ± 5 seconds. A mix outside that range may separate, stiffen, or pass too easily. USACE EM 1110-2-3506 stresses continuous observation of pressure, flow, and grout take during injection. In practice, I check the gauge beside the pump, then compare it with the end-of-line reading. The difference often reveals a hidden restriction.
The ground can consume grout faster than the pump supplies it. Pressure then falls, even when the pump is healthy. Stop and inspect. Clean check valves, remove air, verify the mix, and test the relief setting. Do not assume the gauge is correct; calibration errors happen. My own field checks are not perfect, and temperature changes can distort results. That deserves more attention.
| No. | Possible Cause | What Happens to Pressure | Typical Signs | Recommended Inspection | Corrective Action | Pressure-Maintenance Principle |
|---|---|---|---|---|---|---|
| 1 | Air entering the suction line | Air compresses and interrupts the continuous flow of grout, causing unstable discharge pressure. | Foamy or irregular grout flow, rattling, vibration, and pressure surges. | Check suction-hose joints, clamps, gaskets, inlet fittings, and the material level in the hopper. | Tighten connections, replace damaged seals, keep the suction inlet submerged, and prime the pump correctly. | A flooded, airtight suction path allows the pump to deliver a consistent volume on every stroke. |
| 2 | Blocked or restricted suction inlet | Insufficient material reaches the pumping chamber, so the pump cannot sustain its displacement. | Low output, cavitation-like noise, excessive vibration, or pressure that drops as speed increases. | Inspect the hopper screen, suction hose, inlet valve, and grout for settled solids or oversized particles. | Stop the pump safely, remove the obstruction, clean the inlet components, and improve material screening. | The pump must receive grout faster than it discharges it to avoid starvation and pressure loss. |
| 3 | Worn, damaged, or incorrectly seated valves | Material flows backward through the inlet or outlet valve instead of moving fully toward the injection point. | Pulsating output, reduced delivery, grout leakage, and pressure that cannot reach the required level. | Examine valve balls, seats, springs, seals, and contact surfaces for wear, chips, hardened grout, or misalignment. | Clean or replace defective valve parts and reinstall them in the correct orientation. | One-way valves maintain pressure by preventing reverse flow during the suction and discharge cycles. |
| 4 | Partially blocked grout hose or injection line | Restriction increases resistance, often followed by erratic flow, leakage, or a sudden pressure drop after a blockage shifts. | High pressure near the pump, weak flow at the outlet, hose swelling, or pressure fluctuations. | Isolate the line and check for hardened grout, kinks, sharp bends, crushed sections, and obstructed couplings. | Flush the line using the approved procedure, straighten or replace damaged hose, and remove hardened material. | A clean, correctly sized delivery path prevents unintended pressure loss between the pump and injection point. |
| 5 | Grout mix is too thick or begins to set | Higher viscosity increases flow resistance; setting grout can progressively block valves, hoses, and outlets. | Motor or engine load increases, flow decreases, pressure rises and then collapses, or the pump stalls. | Verify the approved water-to-solid ratio, mixing time, temperature, working time, and grout consistency. | Prepare grout according to the project specification, maintain agitation where required, and clean the system before setting occurs. | Consistent rheology keeps the pump displacement, line resistance, and pressure relationship predictable. |
| 6 | Pump piston, diaphragm, packing, or seals are worn | Internal bypassing allows grout or hydraulic fluid to leak past the moving element, reducing effective displacement. | Visible leakage, reduced output, wet packing area, abnormal wear, or pressure loss that worsens with load. | Inspect wear surfaces, diaphragms, piston cups, packing, rod seals, and internal leakage paths. | Replace worn components, adjust packing only as specified, and lubricate or service moving parts correctly. | A properly sealed pumping element converts mechanical motion into pressure without internal bypass. |
| 7 | Drive speed, power, or hydraulic supply is insufficient | The pump cannot complete its designed stroke or maintain the force required to overcome line and injection resistance. | Slow cycling, reduced flow, motor overload, low engine speed, or pressure loss under load. | Check power supply, motor or engine speed, hydraulic-fluid level, filters, relief settings, and drive coupling. | Restore the specified drive conditions and service filters, fluid, coupling, or power components as necessary. | Stable drive energy maintains the pump stroke rate and the force needed to generate pressure. |
| 8 | Pressure-relief or bypass valve is open or set incorrectly | Part of the pumped material or hydraulic flow returns to the low-pressure side instead of reaching the injection line. | Pressure remains below the target, return flow increases, or the relief valve operates prematurely. | Inspect the valve for contamination, incorrect adjustment, damaged components, or a faulty control signal. | Clean, test, and adjust the valve only within the equipment and project limits; replace damaged parts. | The relief system protects the pump, but an incorrectly low setting prevents pressure from being maintained. |
| 9 | Leaks at couplings, fittings, seals, or the injection point | Grout escapes before reaching the intended void or structure, reducing downstream pressure and delivered volume. | Visible grout leakage, wet connections, falling gauge pressure, or unexpected material loss. | Inspect every connection under controlled conditions and check fittings, gaskets, clamps, packers, and injection ports. | Depressurize safely, replace seals or damaged fittings, tighten connections correctly, and repair the injection point. | A sealed delivery circuit is essential for transferring pump pressure to the grouting zone. |
| 10 | Faulty pressure gauge, sensor, or pulsation dampener | The pump may be operating normally while the instrument gives an incorrect reading, or pulsations may appear excessive. | Gauge needle sticks, fluctuates abnormally, remains at zero, or disagrees with a verified instrument. | Compare the reading with a calibrated test gauge and inspect the gauge connection and dampener for blockage or damage. | Replace or calibrate the instrument and service the dampener according to the equipment procedure. | Accurate measurement and controlled pulsation are necessary to distinguish real pressure loss from indication error. |
Repeated positive-displacement strokes move measured grout volumes through check valves. When resistance increases, pressure rises. A relief valve helps prevent overload.
Hardened grout may restrict the outlet and disturb normal flow. The gauge can fall sharply. Inspect the nozzle carefully.
Yes. Air creates uneven strokes and weak delivery pressure. Check suction joints for leaks. Prime the line properly.
Excess water can cause separation and unstable pumping. Grout that is too stiff increases heat and drive load. Temperature changes matter too.
Comparing both readings reveals hidden hose or valve restrictions. A large difference suggests pressure loss along the line. One gauge is not enough.
Tight bends, leaking couplings, and hardened plugs restrict grout movement. An over-tightened coupling can also create trouble. Inspect the entire hose.
Clean check valves, inspect seals, and remove trapped air. Flush the hose immediately after each pour. Do not force pressure higher.
Yes. Calibration errors and pulsation can hide actual pressure changes. A dampener may steady the needle. My checklist is not perfect; temperature effects deserve more attention.
A grouting pump must maintain steady pressure to deliver grout evenly through hoses, pipes, and injection points. If you are asking, “why is my grouting pump losing pressure,” the problem may come from several sources, including worn seals, clogged filters, leaking connections, damaged valves, trapped air, incorrect pressure settings, or an unstable power supply. Grout that is too thick, too thin, poorly mixed, or beginning to set can also restrict material flow and cause pressure fluctuations.
A systematic diagnosis should begin with checking the grout consistency, hopper level, hoses, fittings, valves, and pressure gauge before inspecting internal pump components. Operators should monitor flow behavior and isolate each section to locate leaks or blockages. Preventive maintenance, including regular cleaning, seal and valve inspections, lubrication where appropriate, and timely replacement of worn parts, helps preserve reliable pressure. Proper material preparation and consistent operating procedures are equally important for stable, efficient grouting performance.

 SSG Machinery